
Essential Tips for Installing the Slim Max 2.0 Click Mechanism
In light of the release of the Slim Max Click Pen 2.0 in a brand new stunning red plating, we’d like to go over the steps involved in correctly installing the Slim Max pen’s 3-piece click mechanism. If you’ve ever turned a Slim Max 2.0 click pen, you’re familiar with the difficulties that little mechanism can cause if not installed correctly.
Keep reading to learn, step by step, how to correctly install your Slim Max 2.0 click mechanism.
How Exactly Does the Click Mechanism Work?
In order to make sure the click mechanism in your Slim Max 2.0 pen functions correctly, it’s important to know exactly how these click mechanisms work.
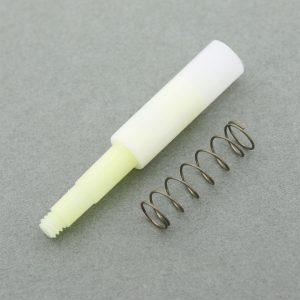
The click mechanism itself sits inside the upper barrel of the pen with the ink refill. There are 3 components that are involved in Slim Max 2.0 click mechanisms: The white outer sleeves that serves as a casing for the mechanism, the two-piece inner sleeve that is responsible for protracting and retracting the ink refill in your finished pen, and the spring, as shown in the photo below.
In the simplest of terms, the two pieces of the inner sleeve have interlocking ridges. When you click the button on a fully assembled Slim Max 2.0 click pen kit, one of these inner pieces is pushed and rotated by the spring until it locks into the other piece, thus pushing the ink refill into an extended position.
That being said, there is an art to installing the Slim Max 2.0 click mechanism, and it begins with…
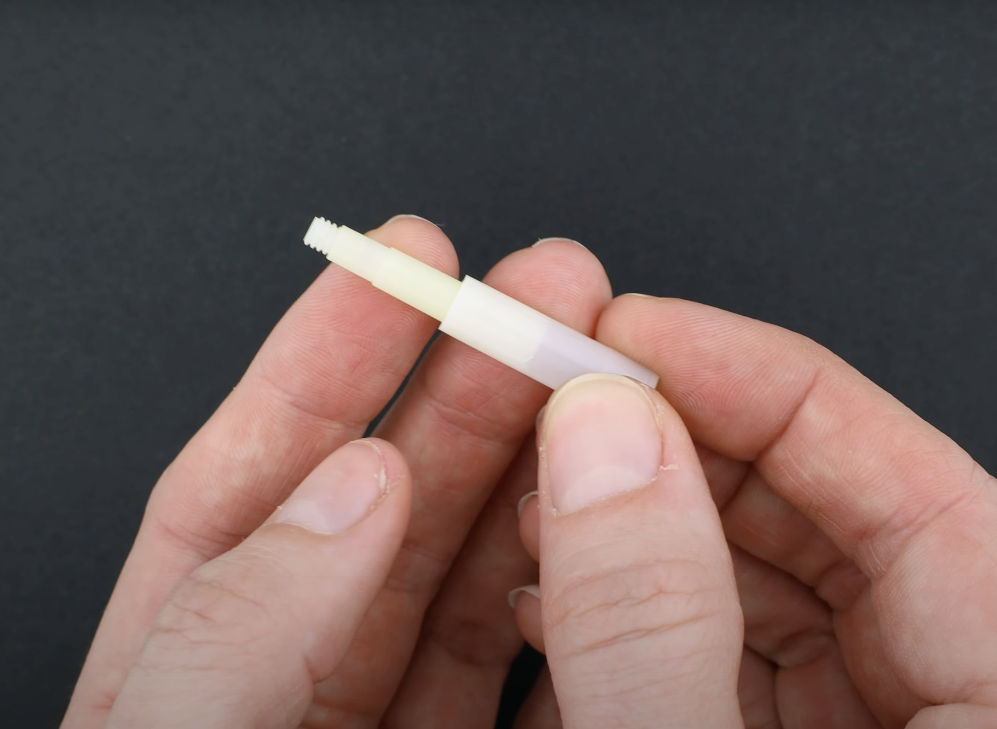
Step 1: Fully Extend Inner Sleeves
In order for your click pen to function correctly, the mechanism must be fully extended. The photos below demonstrate the right and the wrong way to extend your click mechanism prior to installation. The photo on the left shows the INCORRECT way to install your mechanism, as the inner sleeve is only partially extended out of the outer sleeve. The photo on the right, however, shows the CORRECT way to install your click mechanism, with the inner sleeve completely extended.

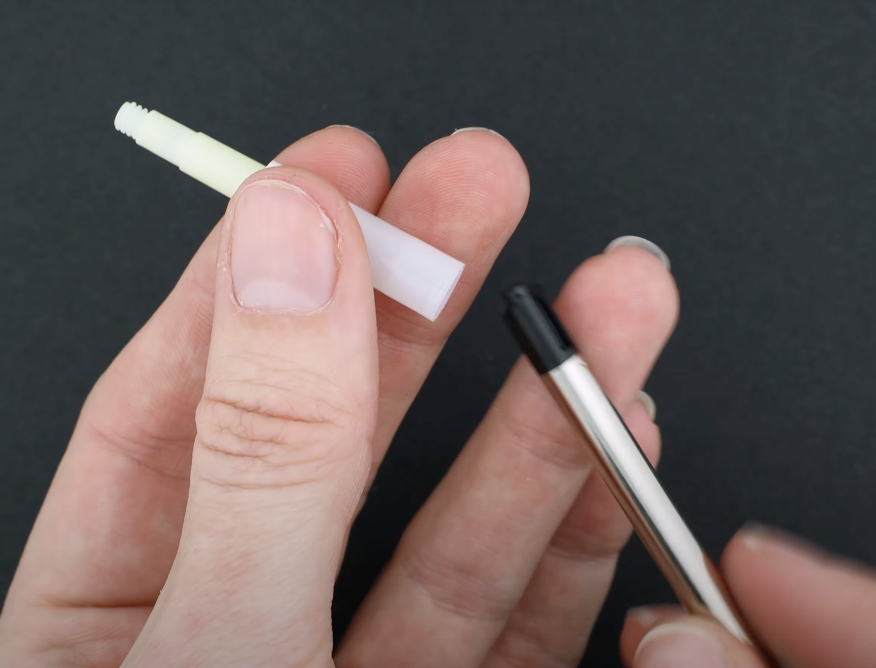
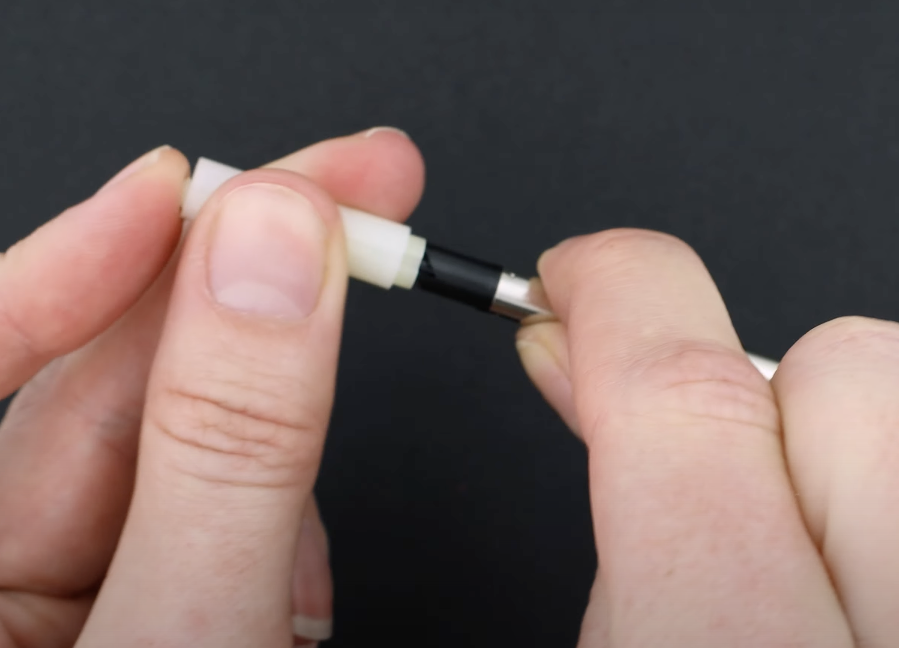
A good way to ensure the mechanism stays in this extended position as you proceed with installation is to use your ink refill! As shown below, simply insert the Parker-Style Ink Refill that comes with every Slim Max 2.0 kit into the bottom of the click mechanism, and the mechanism will stay in it’s fully extended position as you install it.
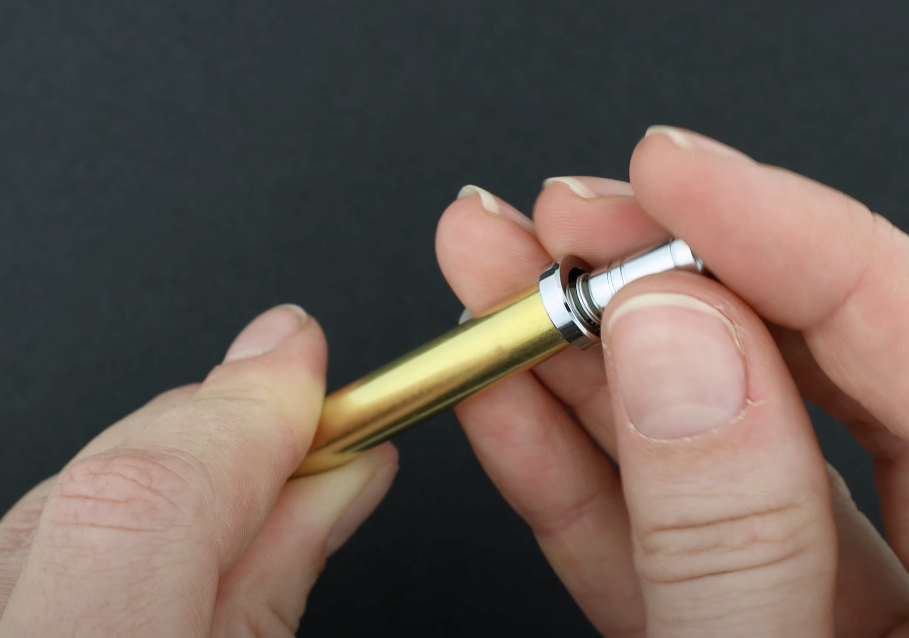
If you notice that your click mechanism doesn’t seem to be fully extending, as it does in the photos above, you can actually click the mechanism itself at this point to ensure it is in a fully extended position. Just hold the click mechanism with your left thumb and forefinger, and the ink refill with your right, and click the threaded end of the mechanism, letting it retract and then fully extend!
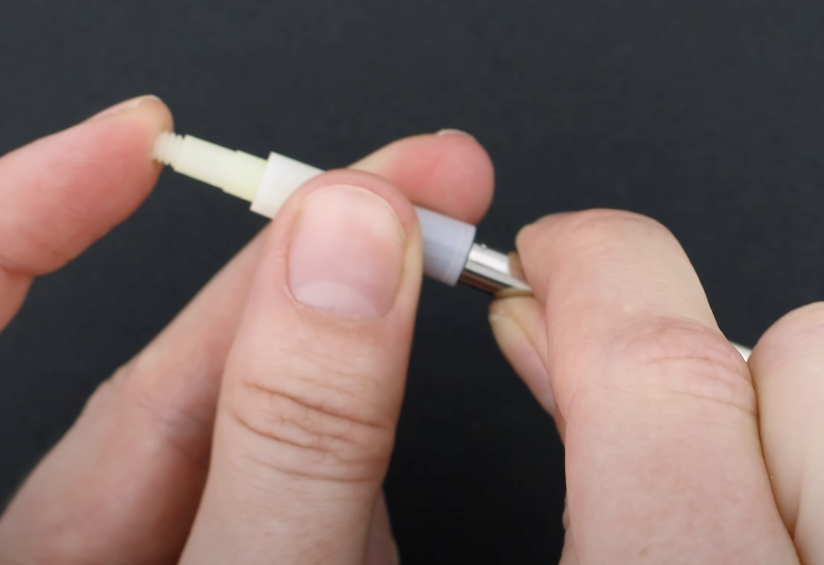

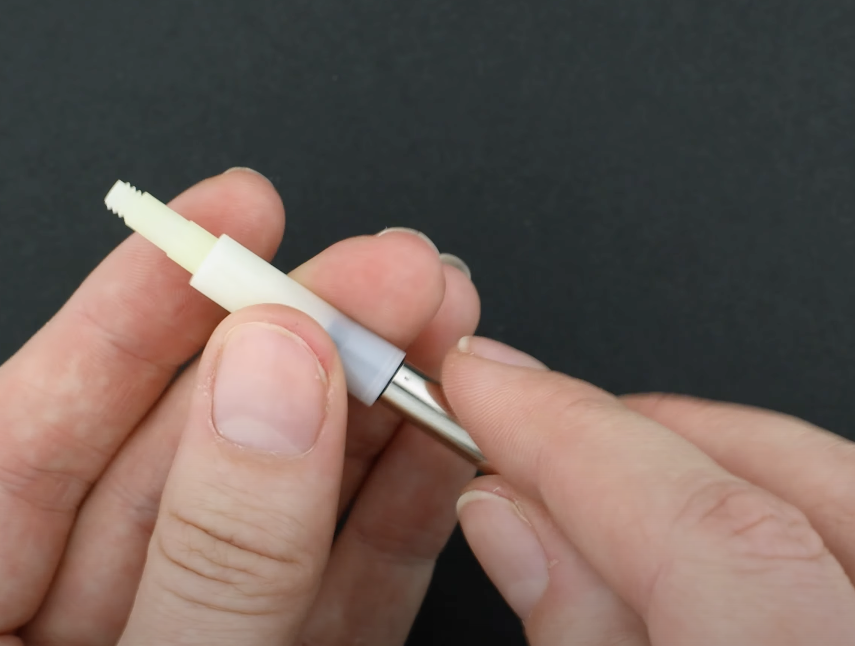
Step 2: Push Mechanism into Upper Barrel
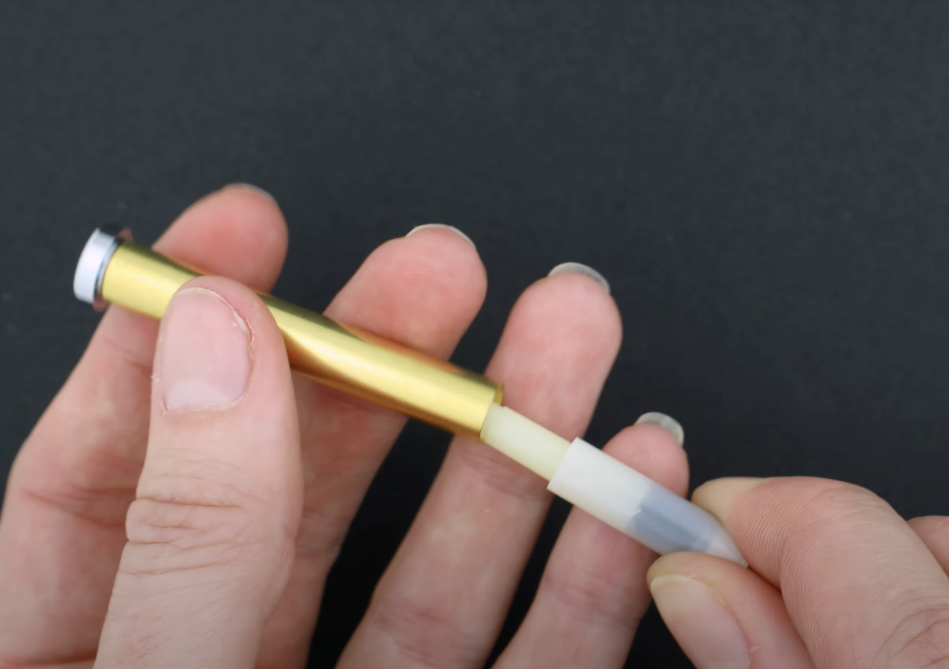
Then, using the ink refill to push the mechanism, firmly hold the mechanism and the ink refill together (in the extended position) and insert the click mechanism into the upper barrel of your pen.
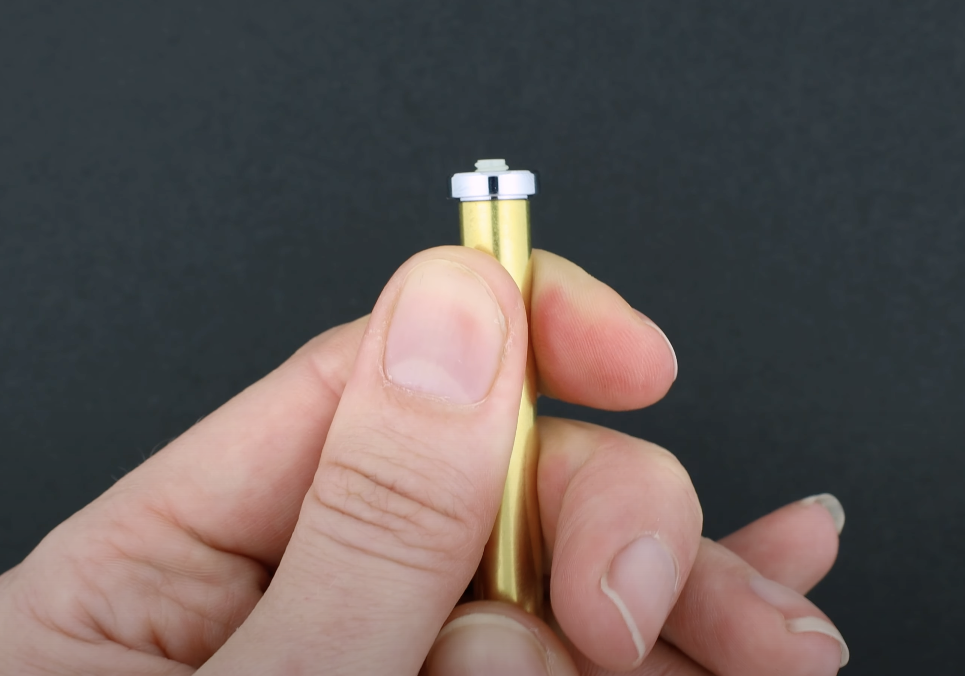
Insert the two pieces into the upper barrel until you can see just a few millimetres of the click mechanism’s thread sticking out of the finial, as shown below.
Step 3: Install Spring and Button
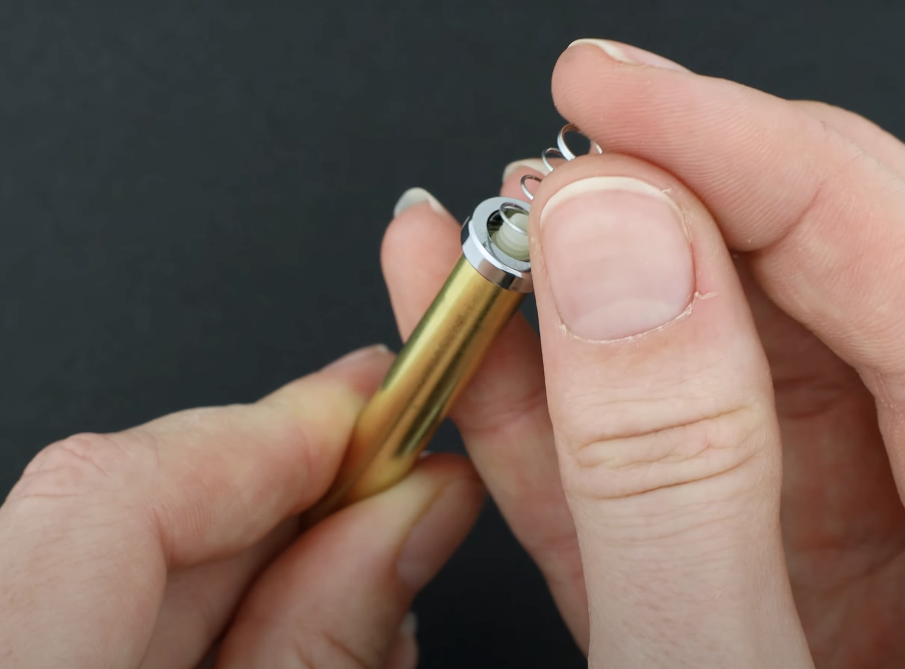
The final step in installing the click mechanism of the Slim Max 2.0 is threading the click button itself onto the mechanism in order to keep it locked in place inside your fully assembled pen.
As outlined in Step 2, the threaded end of the click mechanism should be peeking out of the finial on the upper barrel of your pen blank. All you have to do now is, while still maintaining a firm grip on the ink refill so the mechanism doesn’t slip back into the barrel, drop the spring inside the barrel so it surrounds the threaded end of the mechanism, and screw the click button on!
Step 4: Assemble the Rest!
After you’ve successfully installed the click mechanism into your Slim Max 2.0 click pen, you can assemble the rest of the pen as per the assembly instructions provided with each kit.
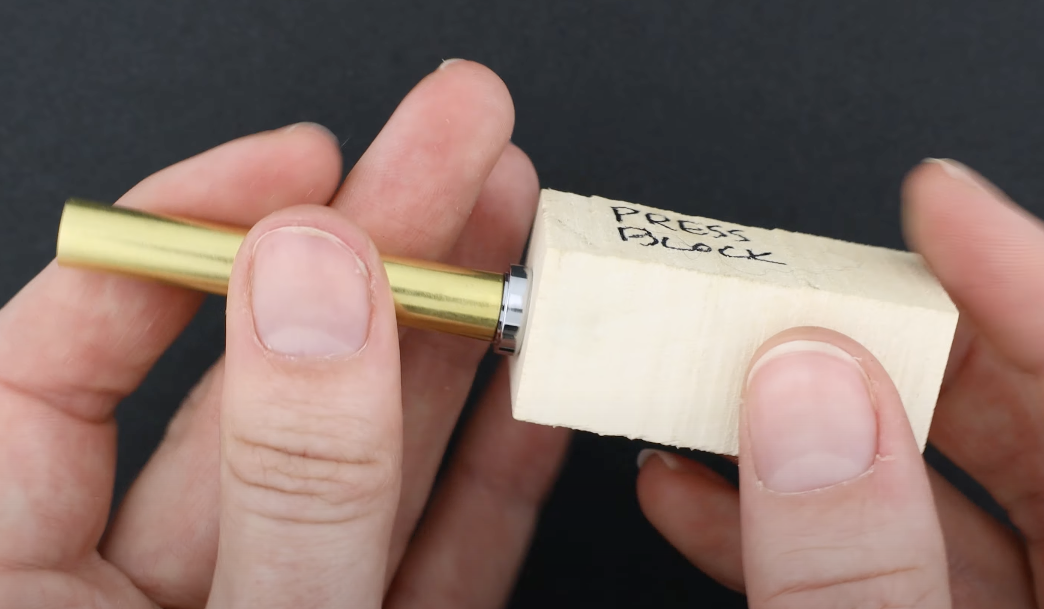
One final tip we have to share regarding installing the Slim Max 2.0 click mechanism is to utilize a press block over the button when pressing the remaining parts of the pen together.
A press block can be made by drilling a roughly 1″ hole into the end of a scrap block of wood, using a drill that is wider than the diameter of your click button.
A press block allows the upper and lower barrels of the pen to be pressed together in a Pen Assembly Press without damaging the click button or the click mechanism itself.
Using a press block means that the pressure of the Assembly Press is being put on the finial, rather than on the click button itself.
There you have it, folks: How to install the click mechanism in your Slim Max 2.0 Click Pen perfectly every single time!
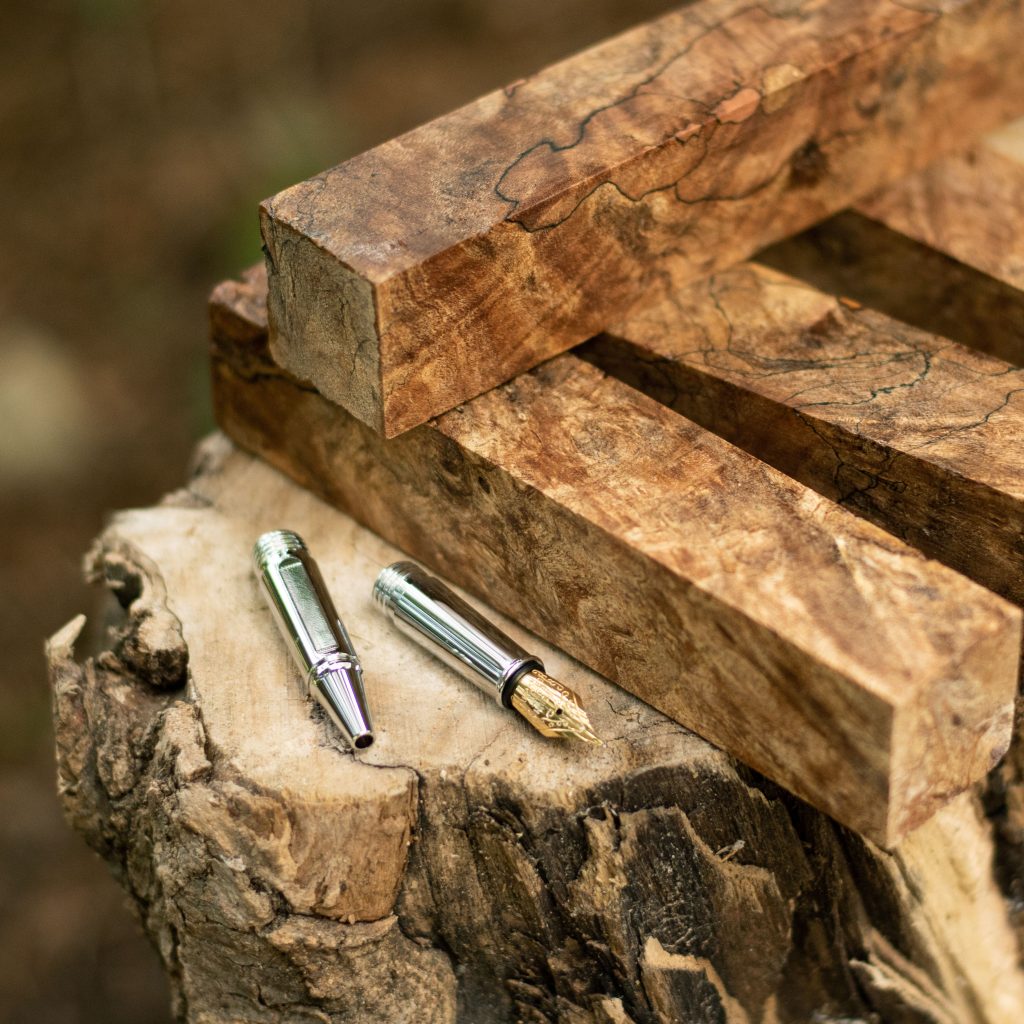
Shop online at penblanks.ca or in-store at William Wood-Write to grab one of our brand new Red Slim Max 2.0 Click Pen kits, pictured below with one of our new Python Honeycomb Pen Blanks!

Subscribe to our newsletter to get all the deals! We promise we won’t bother you, only two emails a week on Wednesday & Sunday to enjoy with that morning coffee.

